
Here are the basics for making latte art! With these tips for beginners, you can start practicing in the comfort of your own home.

Would you like to learn how to make latte art… in the comfort of your own home? We are here to help you ! We’re a couple of chefs, two baristas (and mixologists) obsessed with coffee. After years of practice, we’re ready to share our tips for making latte art at home! If you are a professional barista, this position is not for you. But if you’re a beginner with an espresso machine ready to learn the basics… let’s get started!
How to Make Latte Art: Video Tutorial!
latte art is a way of preparing a milk coffee in which the microfoam forms a pattern on the surface. It is a complex process to master due to the specific quality of frothed milk required. Professional baristas can create extremely intricate designs (and there are even latte art competitions).
This tutorial is for beginners who have an espresso machine with steamer and want to try some basic designs at home. The best way to learn this skill is to watch it. So watch this video tutorial first, then we’ll break down all the basics below.
Necessary: espresso machine with steam wand
To make latte art, you need an espresso machine with a steam wand. Why is it mandatory?
- You need perfect microfoam to make latte art. Microfoam has the magical “wet paint” texture that allows you to draw the designs into the espresso. You simply can’t achieve that with a milk frother: although it makes a delicious latte!
- What is the best espresso machine? Here’s the espresso machine we use: it’s mid-range and works great. We tried a cheap espresso machine but it doesn’t have the frothed milk quality like this one. In our opinion, it is therefore worth investing a little more for quality.
What is special about microfoam?
microfoam what’s behind great latte art, and that’s hard to achieve. You are looking for a texture close to “wet paint”. Also known as velvet milk, it is glossy and has very small, uniform bubbles. It’s silky smooth and has a sweet, almost nutty flavor that makes it the perfect espresso drink.
If you don’t get the right texture and amount of bubbles, you won’t be able to make latte art. Finding the right touch with your espresso machine and accessories can take months. Do not give up! Practice makes perfect here.

What you need to make latte art
Aside from the espresso maker, there are some specific things you need to make latte art! Here’s what to make sure you have on hand:
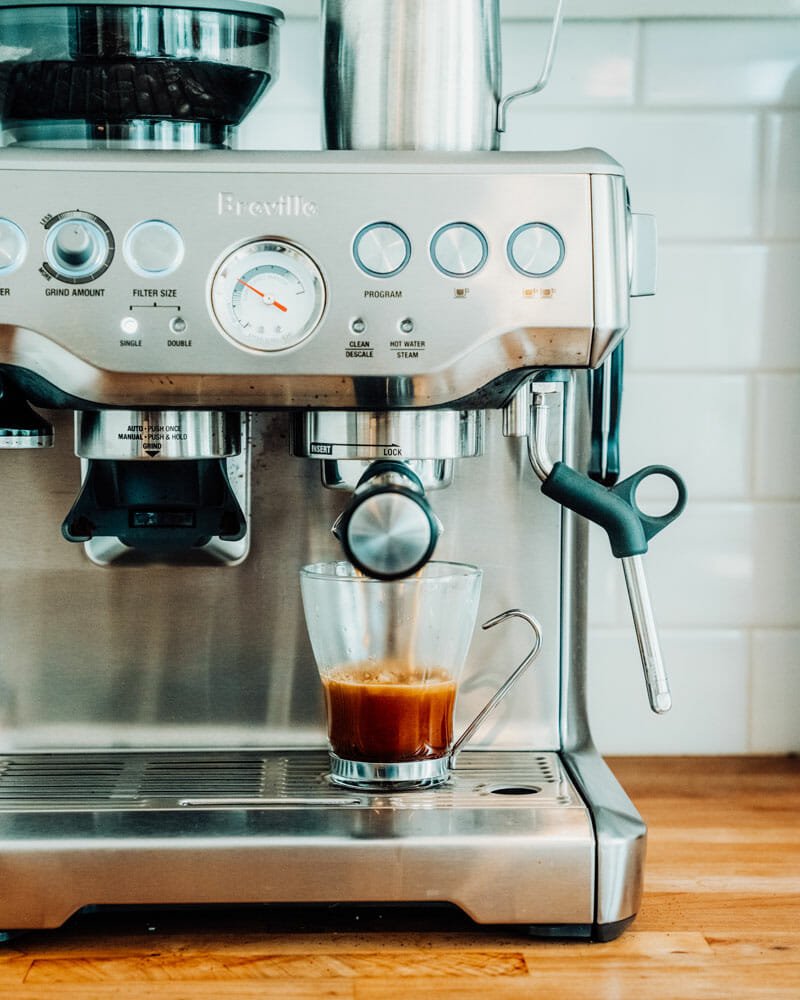
- Espresso machine with steam wand: we use this Breville espresso machine; It helps to have a medium to high quality espresso machine to get the right microfoam for frothed milk
- Metal jug with temperature sticker: Use a metal jug and chill it beforehand, which helps because the colder the milk, the more time you have for steaming. Better yet, get a metal jug with a temperature sticker that makes it easy to see when it’s at the perfect temperature! You can also use a handheld thermometer or judge by hand (see recipe below).
- 6 ounce mug. It’s easier to make latte art when you have a cup that’s the final size of the drink. This will help you add just the right amount of milk. We use these 6 ounce cups and they work great!
Best milk for frothing
To make a perfect latte art, you need to start with the right raw material! The absolute best latte art is made with whole milk. You could try non-dairy oat milk, but it just isn’t the same.
- Use whole milk. Whole milk makes the best microfoam because it contains the most milk fat.
- Important: Make sure the milk is as fresh as possible! Milk that is approaching its expiration date also does not foam. (Trust us, we know this from experience!)
- You can try non-dairy oat milk. Oat milk froths better than any other milk, but it just doesn’t produce the same quality latte art as whole milk.

Important tips for making latte art at home
Ready to start? Before skimming through the recipe below, here’s what you should know to make latte art at home:
- Grab your espresso maker, fresh whole milk, a metal pitcher, and 6-ounce mugs. See the sections above for details. Keep your metal jug in the fridge because the colder the milk, the more time you have to froth it into the perfect microfoam.
- Read how to steam milk to learn how to get microfoam. Latte art is all about the right microfoam, so that’s 95% of the process.
- Watch the video above. Watch it as many times as you can before moving on to the recipe below!
- Practice, practice, practice. You need to be very confident in your movements to do good latte art. Slow movements result in poor quality latte art: but it’s still drinkable! Keep practicing until you are able to execute each design with better control.

Latte Art Designs
The recipe below will show you how to make a latte art tulip mold. But there are many easy patterns for beginners! Here are a few ideas:
Ready to start?
Scroll down to the recipe and let’s get started!
The description
Here are the basics for making latte art! With these tips for beginners, you can start practicing in the comfort of your own home.
- 2 espresso (2 ounces)
- 4 oz frothed milk
- Preparation for the latte art: Grind and tamp the espresso, but don’t pull on it. Keep your milk jug in the fridge: the colder the milk, the more time you have to get the right consistency. Or rinse with very cold water, dry and put in the fridge for a few minutes. Fill your creamer with very fresh whole milk (or oat milk for vegans) to just below the spout, about ¾ cup.
- Prepare espresso: Use an espresso machine to prepare two shots of espresso and pour them into a cup.
- Steam the milk: Heat up the steam nozzle. Once prepared, place the baguette just below the surface of the milk, about ½ inch from the side, tilting the jug slightly. Hold it in this position for about 5-10 seconds and using very light up and down movements, stretch the milk by about 30% in height. Once stretched and slightly foamy, lower the nozzle another ½ inch and tilt the jug just enough for a spinning vortex that traps the froth and turns it into a velvety microfoam. Keep it still and rotate until the temperature is about 150 degrees Fahrenheit. (Using a pitcher with a temperature sticker is very helpful.) Turn off the steam before removing the wand from the pitcher. Wipe the wand with a clean cloth. Turn it on for 1 second to flush the nozzle. Tap and swirl the pitcher to incorporate the bubbles at the top. The final texture should look like fresh paint or melted ice cream, smooth and velvety. You only use about half that amount and can discard the rest (see note* below).
- Make latte art (watch the video first!): Tap the milk container on the counter and swing it around to dislodge large bubbles. Hold the jug a few inches above the coffee and pour in enough milk to fill the cup halfway, swirling to incorporate the milk. Then lower the pitcher to the surface. Tilt the cup toward you 45 degrees. Pour the milk into the center of the cup while shaking the jug from side to side to get the heart pattern (for the leaves), then lift it up and make another heart pattern on top (the tulip flower). When the cup is almost full, lift the pitcher and draw a line through the center to form the stem. Watch the entire video multiple times to see how to form the tulip shape. It takes practice to perfect (it took months!). Good luck and let us know your questions in the comments below.
Remarks
*This is enough for 2 glasses as it is easier to froth a larger amount of milk. Discard excess milk. If you have an espresso machine with two espresso taps, you can use that to make another flat white. (Milk becomes less foamy while it’s sitting, so waiting to make another espresso isn’t ideal.)
- Category: drink
- Method: espresso machine
- Kitchen: espresso
- Diet: vegetarian
Keywords: Latte art how to make latte art how to make latte art


