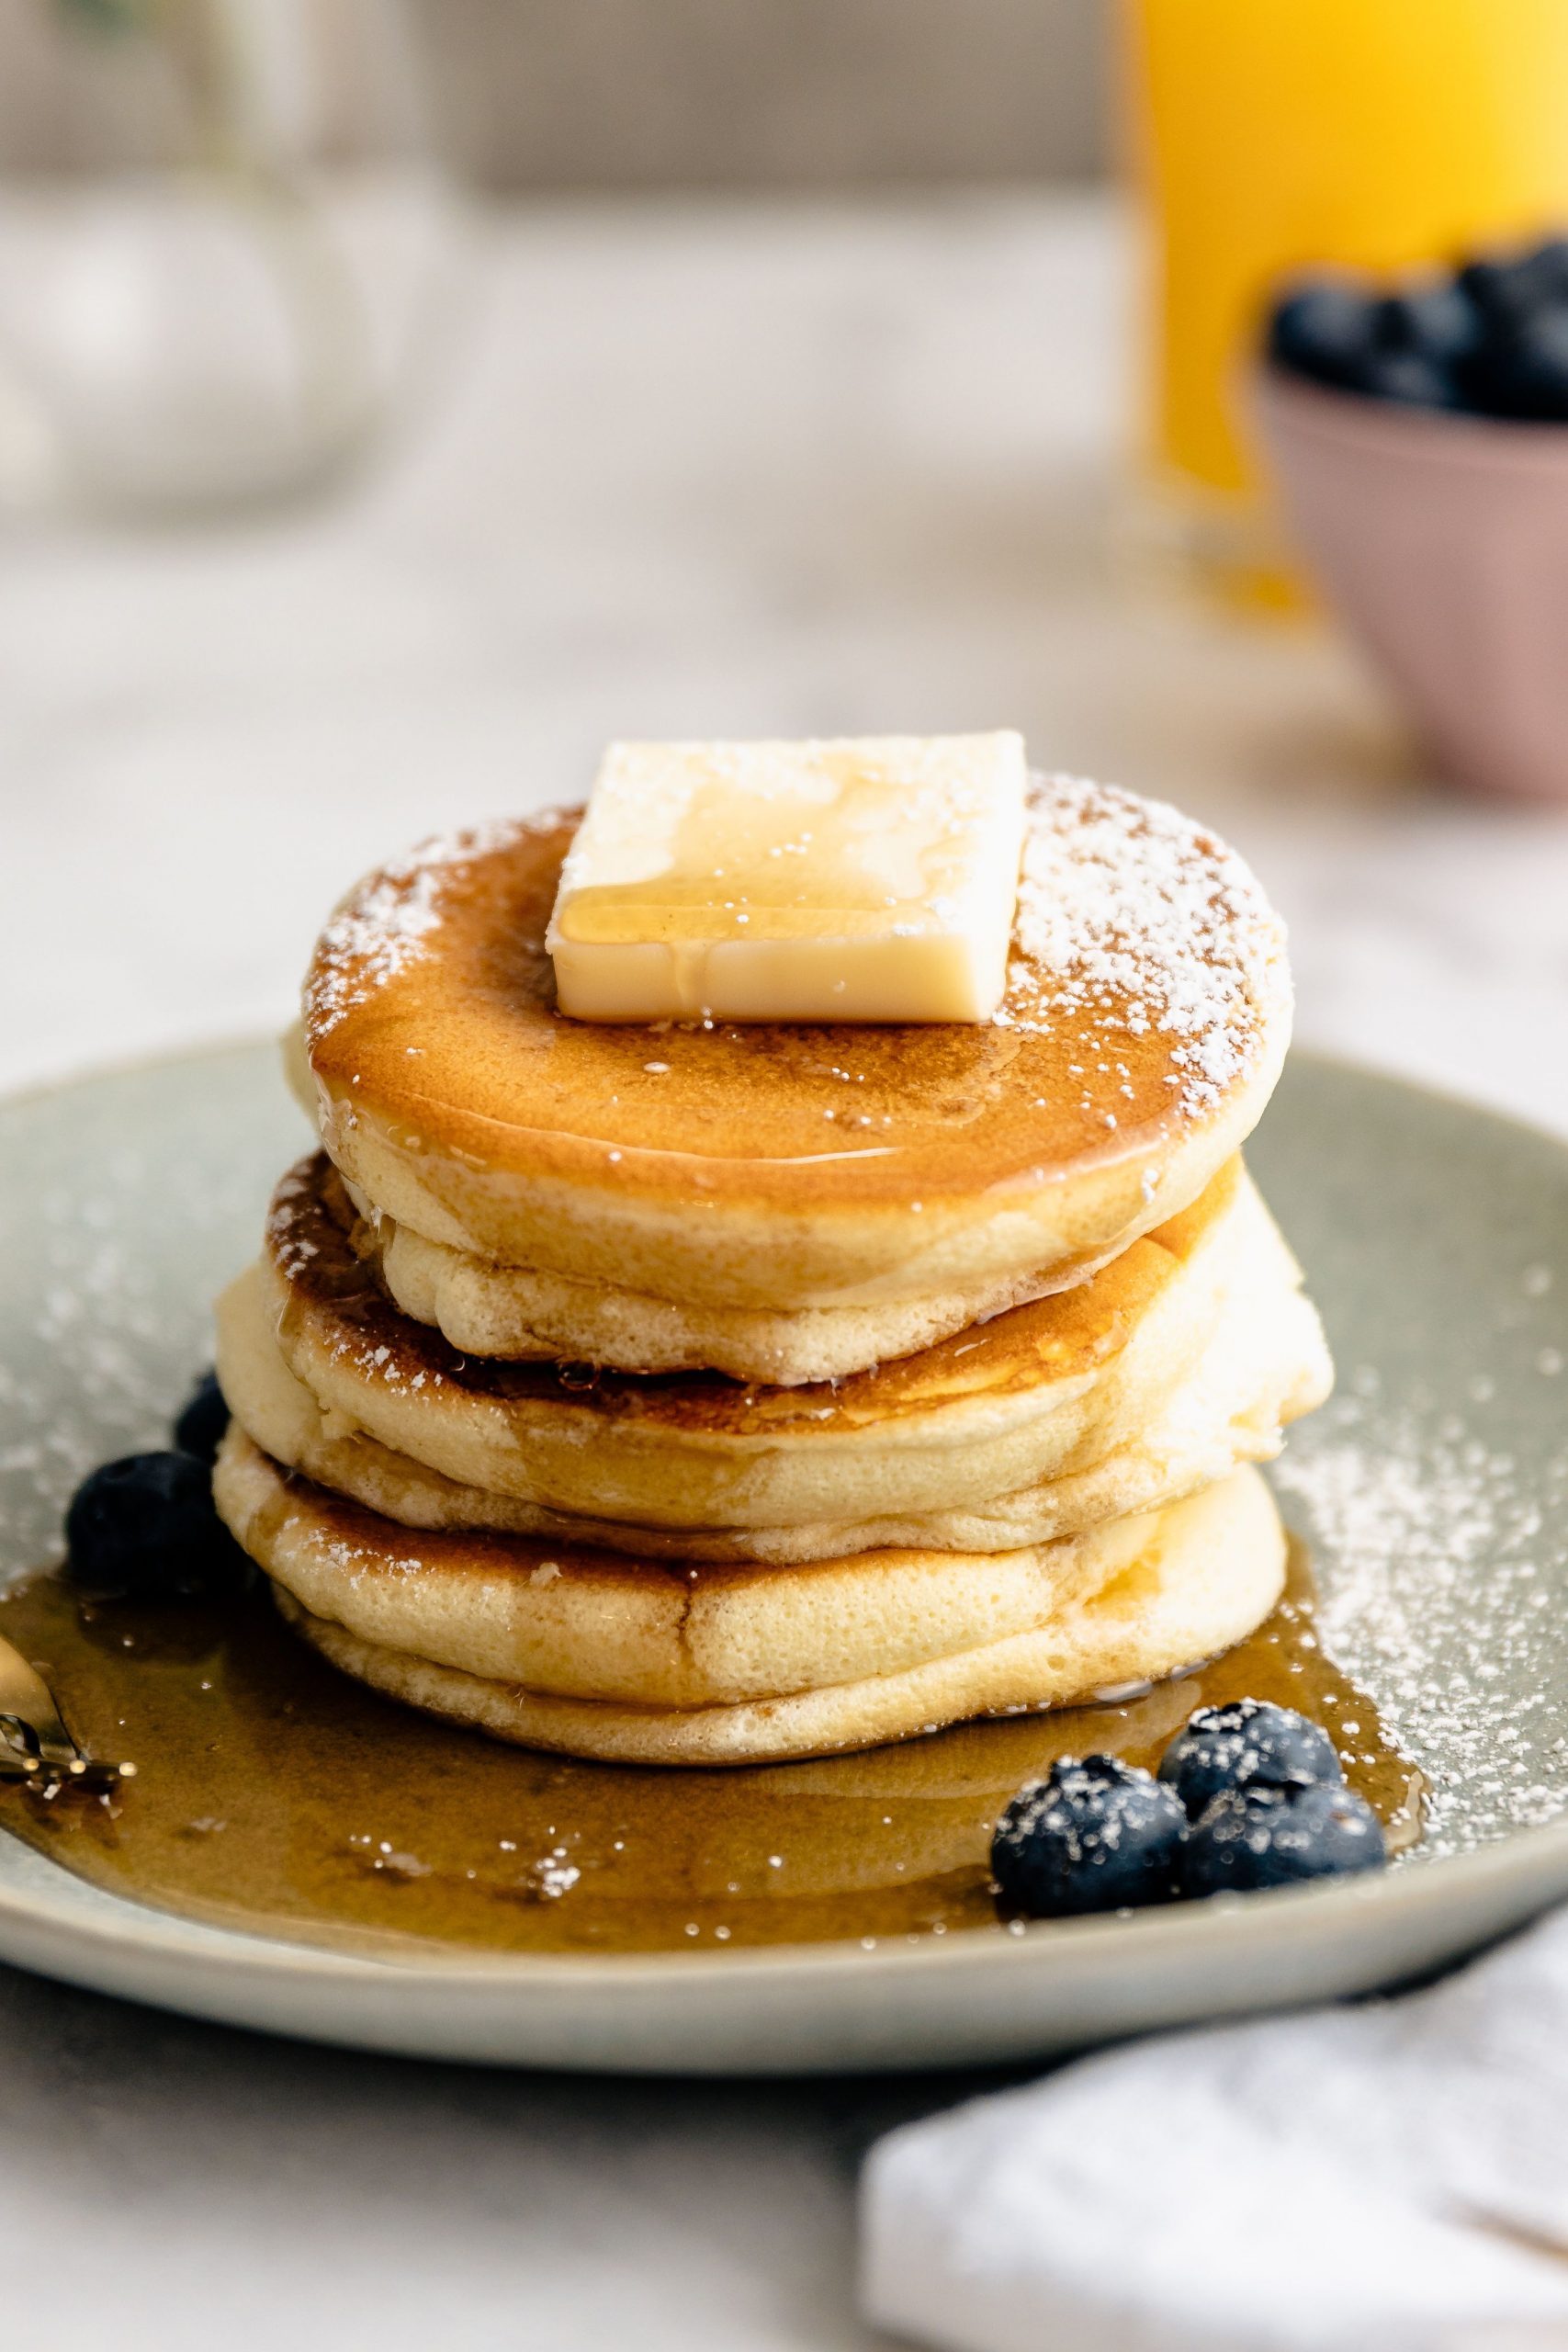
Japanese soufflé pancakes are the holy grail of fluffy pancakes. They are cloud-like, airy, large and sweet. Your family will be so impressed!
In this recipe
-
origin
-
Practice creates masters
-
substitutions
-
portion
Japanese soufflé pancakes are a cross between fluffy soufflés and flat, sweet American-style pancakes — they require the same ingredients of flour, eggs, sugar, milk, and baking powder, just a lot less of them. Plentiful billowing meringue, whipped egg whites stabilized with sugar and cream of tartar are folded into the pancake batter, making it incredibly fluffy.
These stunning pancakes are a labor of love. They take some practice to perfect and need to be cooked and served right away. You can only cook two or three at a time as they require space in the pan to turn. Make a note of these if you have time for a leisurely brunch or want to impress someone.
Despite their name, Japanese soufflé pancakes originated in Hawaii. According to the story, the pancakes were created by a chef at Cream Pot, a restaurant in Waikīkī. Chef Nathan Tran wasn’t a fan of pancakes, but he did like soufflés.
To placate Japanese tourists who craved American-style pancakes, he invented these soufflé pancakes, which were then brought to Japan, where they became very popular. They made their way across Asia and back to the US via chain restaurants and independent cafes.
Practice makes perfect, plus tips!
i won’t lie These pancakes are tricky and take practice to do well – they can deflate and it’s a little hard to tell when they’re done and ready to flip. I felt a real sense of accomplishment when they came out nice and big. Rest assured that the pancakes will still taste good even if they aren’t pretty.
Here are some tips to help you:
- Use a clean metal or glass bowl to beat the egg whites. Plastic bowls can still retain fat, preventing protein from reaching its full potential.
- The egg whites should be cold before whipping. You can even refrigerate the bowl.
- Be very careful when folding the meringue into the batter to keep as much air intact.
- I recommend using a pastry brush to lightly coat the pan with some oil. You don’t want the remaining oil to burn while the pancakes are baking.
- Don’t overcrowd the pan as you’ll need room to turn the pancakes. I use a 12″ pan to cook 3 pancakes at a time. If your pan is smaller, cook 2 pancakes at a time.
- Cook the pancakes on a very, very, very low heat so the bottom doesn’t burn before the center is cooked and set.
A few substitutions that work
These pancakes are tricky so I can’t swap out too many ingredients. Here are a few you work:
- Use 2% milk instead of whole milk.
- Use 1 tablespoon of lemon juice or distilled white vinegar in place of cream of tartar.
- Use almond extract instead of vanilla extract.
CONTINUE READING:
How to serve Japanese soufflé pancakes
Japanese soufflé pancakes can be served with a variety of toppings. Restaurants often stack them in a tall tower of up to 3 pancakes and enough toppings to send you into a sugar coma. Feel free to be as sensible or generous as you like:
- A knob of butter or a ball of whipped butter
- Dust with icing sugar
- A dash of maple or chocolate syrup
- Generous dollops of whipped cream
- vanilla pudding
- lemon curd
- jams or compotes
- fresh berries
Not your average pancakes
- Carrot Cake Pancakes
- Gingerbread pancakes with caramelized pears
- Danish babe
- Lemon Ricotta Pancakes
- Zucchini Walnut Pancakes
Japanese soufflé pancakes
This recipe cooks 3 pancakes at a time that fit on a large (12 inch) skillet. Cook 2 at a time if your pan is smaller. The cooked pancakes should be served immediately. If you want to serve all 6 pancakes at the same time, you need to use 2 pans.
ingredients
-
2 egg yolks and 4 egg whites (4 Big Eggs total), cold straight from the fridge
-
1/4 cup (33G) all purpose flour
-
1 teaspoon baking powder
-
1 teaspoon vanilla extract
-
1/16 teaspoon kosher salt
-
2 tablespoon whole milk
-
1 tablespoon avocado or rapeseed oilplus more for the pan
-
1 teaspoon cream of tartar
-
1/4 cup (50G) sugar
method
-
Make the yolk mixture:
Separate the 4 eggs – you will need 4 egg whites in a large bowl and 2 yolks in a separate large bowl. Save the remaining 2 yolks for another use.
Place the egg whites in the fridge to chill while you prepare the yolk batter.
Add flour, baking powder, vanilla, salt, milk and oil to the yolks. Whisk until smooth and set aside.
-
Preheat pan:
Heat a large (12 inch) non-stick skillet over it very, very, very low heat. My hob goes from 0 to 10 and I set it to 1.
-
Make the meringue:
Take the egg whites out of the fridge and add the cream of tartar. Use a hand mixer to beat them on medium-low speed for about 30 seconds. You can also use a stand mixer.
Increase speed to medium and beat for 1 minute, gradually adding the sugar. Then increase speed to medium-high and beat until egg whites are glossy and billowy, forming firm peaks. It should take about 5 minutes from start to finish. The meringue is done when you can turn the bowl over and it doesn’t fall out.
-
Make the dough:
Scrape about 1/2 cup of meringue into the egg yolk mixture and whisk gently. This will make it easier to incorporate the remaining meringue into the batter.
Add about half of the remaining meringue and gently fold under with a spatula until mostly mixed – you will still see white streaks. Fold in the remaining meringue. Be gentle and take care not to mix too much. The dough should remain light and airy.
-
Cook pancakes:
Use the pastry brush to lightly brush oil onto the pan. Use a large spoon to scoop 3 equal sized pancakes, about 3 generous tablespoons each, with batter piled high. Do not spread the batter with the spoon.
Immediately pour about 1 tablespoon of water onto an empty spot in the pan, trying not to let the water touch the pancakes. This creates steam to keep the pancakes moist. If the water sizzles and immediately evaporates, your pan is too hot – reduce it even more.
Immediately cover the pan with a lid and let the pancakes cook for 10 minutes. The exact cooking time depends on how much heat the lowest setting on your stove puts out. It should cook very low and slowly.
Try not to lift the lid while the pancakes are baking.
Store the rest of the dough in the fridge.
-
Turn pancakes:
After 10 minutes, add 1 tablespoon of batter to each pancake.
Insert an offset spatula or a very thin spatula under a pancake – it’s best to use the long side of the offset spatula, not the tip. The pancake will easily pop out of the pan when done. Don’t force it! If it starts to break down, let it cook for another 2 to 5 minutes with the lid closed, but don’t increase the heat.
Carefully flip all 3 pancakes. The bottoms, now on top, will be a deep golden brown. Cover the pan and cook for about 8 minutes. When the pancakes are done, they will easily pop out of the pan.
-
Serve pancakes:
Serve the pancakes right away – leftovers aren’t great. The pancakes can deflate a bit, but that’s okay!
Follow the same methods to cook the remaining pancakes.
Did you like the recipe? Let’s star down!
| nutritional information (per serving) | |
|---|---|
| 283 | calories |
| 12g | Fat |
| 31g | carbohydrates |
| 12g | protein |


